
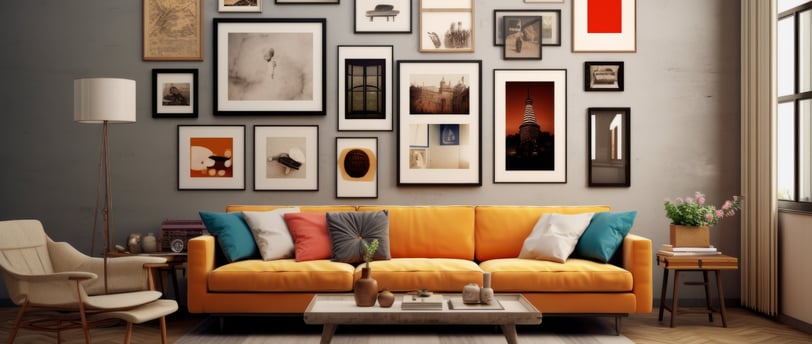
Budget-Friendly Gallery Walls That Wow
Discover how to create stunning gallery walls on a budget using DIY tricks, affordable finds, and a little creativity.
Dreamy Decor | Steph B
2/27/20255 min read
If you’re anything like me, you’ve probably spent countless hours scrolling through Pinterest, drooling over those perfectly curated gallery walls that seem to effortlessly tie a room together. You know the ones—eclectic frames, gorgeous art prints that scream "I totally meant for this to look this good." I’m here to tell you that you can have that wow-worthy gallery wall without breaking the bank. Today, we’re diving into how to craft budget-friendly gallery walls that look like a million bucks—because who says style has to cost a fortune?
Let’s start with the basics: a gallery wall is all about personality. It’s your chance to showcase what you love—whether that’s bold colors, quirky finds, or a mix of textures that make your space feel uniquely you. The best part? You don’t need to drop a paycheck at a fancy home goods store to make it happen. With a little ingenuity and some affordable staples, you can build something that’s not only eye-catching but also a conversation starter. Ready to get started? Grab your coffee (or tea), and let’s dig in!
Step 1: Plan Your Vision (Without Overthinking It)
Before you start hammering nails into your wall—or panic-buying frames—take a moment to consider your vision. Are you leaning toward a cozy, lived-in feel with warm tones and mismatched frames? Or maybe something a little more polished and modern with clean lines and monochrome art? The beauty of a gallery wall is that it can flex to fit your style and your budget.
Pro tip: lay out your ideas on the floor first. Use painter’s tape to mark a rough shape on your wall (think rectangle, organic cluster, or even a heart if you’re feeling whimsical). This way, you can play around with placement without committing to anything permanent. If you’ve got a phone handy, snap a pic of your layout to reference later—it’s like a cheat sheet for when you’re ready to hang everything up!
Step 2: Source Affordable Frames and Art
Let’s talk frames. Yes, those gorgeous gilded ones from high-end stores are tempting, but you can find equally charming options without the hefty price tag. Hit up thrift stores, garage sales, or dollar stores. A $5 can of matte black or soft white can transform mismatched frames into a cohesive collection—perfect for that eclectic-but-put-together look.
Now, what about the art itself? You don’t need to shell out for limited-edition prints to make your wall pop. Here are some budget-friendly ideas:
Printables: Websites like Etsy have downloadable art at a wide range of prices—just print them at home or a local copy shop on cardstock. Look for botanical sketches, abstract designs, or even vintage-inspired pieces that match your aesthetic. Or consider signing up for a free Canva account—you’ll find a variety of inspiration plus free templates.
DIY Magic: Got a stash of old magazines or calendars? Cut out cool images and frame them.
Photos: Raid your phone for personal pics. Black-and-white prints of your travels or family moments add a heartfelt touch without costing much.
Nature Finds: Pressed leaves or flowers in simple glass frames (check dollar stores for these!) bring an organic vibe that’s practically free.
Mix and match these ideas to keep things interesting. A gallery wall thrives on variety, so don’t be afraid to blend a thrifted frame with a DIY creation and a printable or two.
Step 3: Get Creative with What You Already Have
One of my favorite tricks for staying on budget is shopping my own home. That random mirror you’ve been meaning to hang? Pop it in the mix for some unexpected shine. A woven basket or a small shelf can break up the frames and add texture. Even a kid’s drawing or a postcard from a trip can become art with the right frame.
If you’re crafty, lean into some playful DIYs. Try painting a canvas with bold strokes (acrylics are cheap at craft stores like Michaels), or use washi tape to create geometric “art” on plain paper. These little touches add personality without requiring a big investment. Plus, they’re fun to make—consider it a mini art therapy session!
Step 4: Affordable Tools and Hacks for Hanging
Hanging your gallery wall doesn’t have to be a headache—or a budget buster. Skip the expensive wall anchors unless you’re dealing with heavy pieces. For most lightweight frames, a pack of Command Strips from Amazon or Target (around $10) will do the trick—and they’re renter-friendly, too. If you’re going the nail route, a basic hammer and a $3 pack of nails from Home Depot are all you need.
Here’s a game-changer: use paper cutouts of your frames to test your layout on the wall before committing. Trace each frame onto kraft paper or newspaper, cut them out, and tape them up with painter’s tape. Move them around until you love the arrangement, then swap in the real deal. It’s a zero-cost way to avoid a wall full of regret holes!
Step 5: Add That “Wow” Factor on a Dime
A gallery wall isn’t just about the frames—it’s about the magic that happens when it all comes together. To really make it stand out, weave in some low-cost extras. String fairy lights (a $10 set from Wayfair or Amazon) around the edges for a cozy glow. Or place a small plant on a shelf within the display for a pop of green.
If you’ve got a bigger frame, try layering smaller ones in front of it for depth—think of it as a 3D art moment that costs nothing extra. And don’t shy away from bold choices! A thrifted frame painted in a wild color (hello, mustard yellow or teal) can be the star of the show without needing pricy art to back it up.
Budget Breakdown: How to Keep It Under $50
Let’s crunch some numbers—because affordability is the name of the game. Here’s a sample plan:
Frames: 5 thrifted frames at $2 each = $10
Art: 3 Etsy printables at $5 each = $15, plus 2 DIY pieces (paper, paint, etc.) = $5. Bonus for free creations through Canva.
Hanging Supplies: Command Strips = $10
Extras: Fairy lights or a plant = $10
Total: $50 (with wiggle room for coffee while you create! And maybe less when you shop what you already have at home.)
The point is that you can do this without draining your savings.
Why This Works for Any Space (and Budget)
Whether you’re decorating a tiny apartment or a sprawling home, a gallery wall adapts to your space—and your wallet. It’s forgiving, too. Messed up the spacing? Call it “eclectic charm.” Found a frame that doesn’t quite match? Paint it or swap it later. This is your playground, and the only rule is to have fun with it.
Ready to raid your local thrift store or dig into that craft drawer? A gallery wall that wows is totally within reach—I’m all about cheering on your decor wins! Happy creating, friends!